Now that browsers support wide-colour gamuts with P3, I have been wanting to build a colour picker that could select colours from outside the standard sRGB gamut. As the feature became more broadly available in browsers I’d seen a few examples popup from various people such as Gradient.style, the ColorJS.io picker demo, and OKLCH.com. However, I found these all to be either very complex or require additional steps such as selecting a colour space. They just didn’t behave like a normal colour picker you’d find in a design app.
Demo
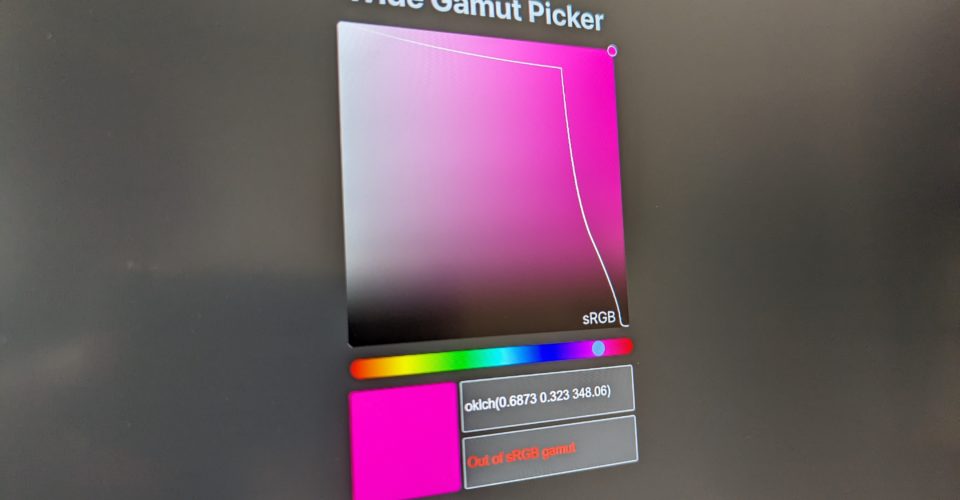
Firstly, here is the finished demo, then read on for the implementation.
If your device supports P3 color then you will see a HD Color checkbox. Check this box to enable the HD mode. Otherwise you will just see a standard colour picker.
Introduction
I’ve built quite a few colour pickers over the years and I find them quite an interesting challenge to implement well. I’ve found most freely available JavaScript colour pickers to be pretty janky, and I’m yet to find one that supports wide-gamut colour. Hence why I build my own. I’ve made few posts in the past on the topic:
- How the latest version of Chrome broke my gradient editor
- Creating a mathematical colour picker
- Gradient Slider V1
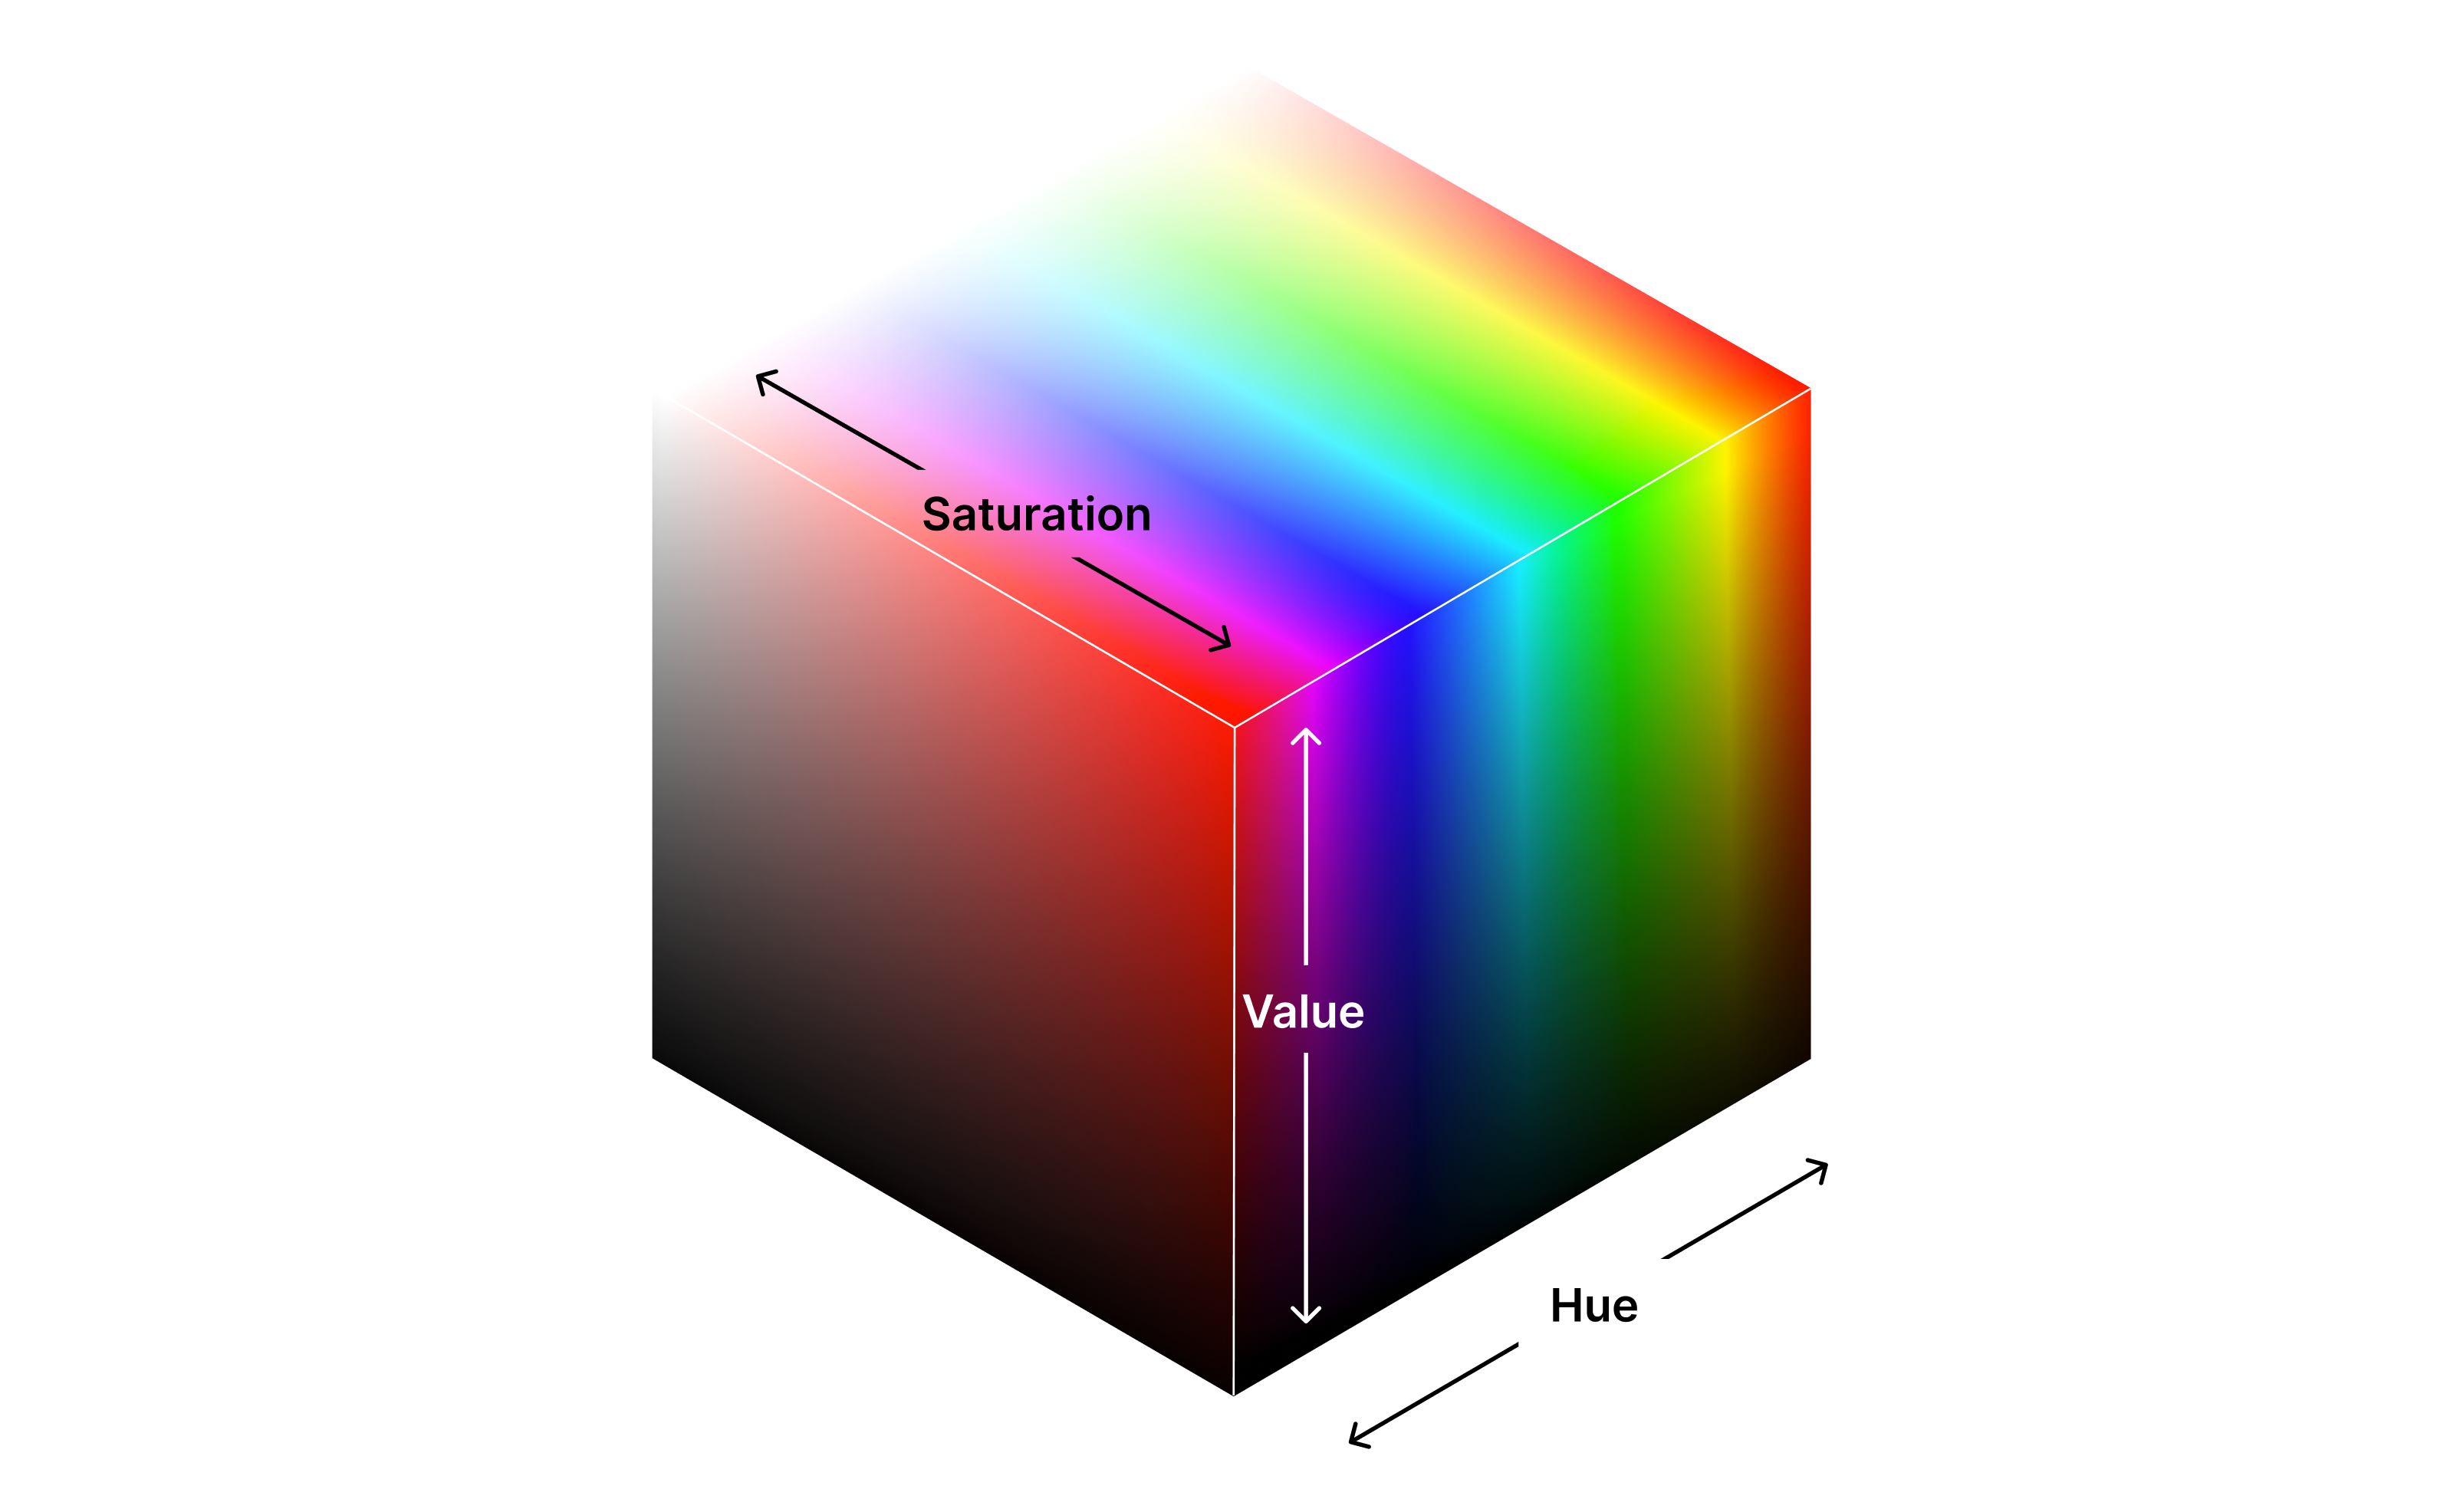
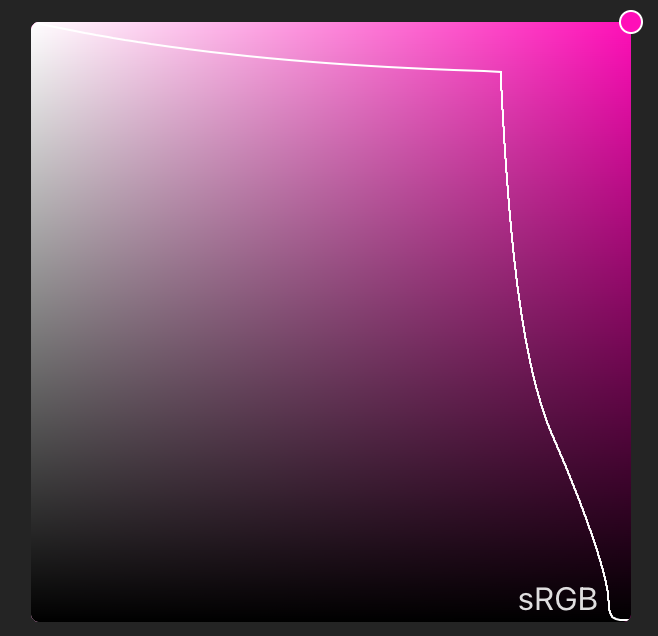
I wanted to implement a typical design tool colour picker which is based off of a HSV cube. For this you have a hue slider, and a 2d slider to pick the saturation (whiteness) and value (blackness). Using HSV makes the math for translating the colours between data and UI much simpler.
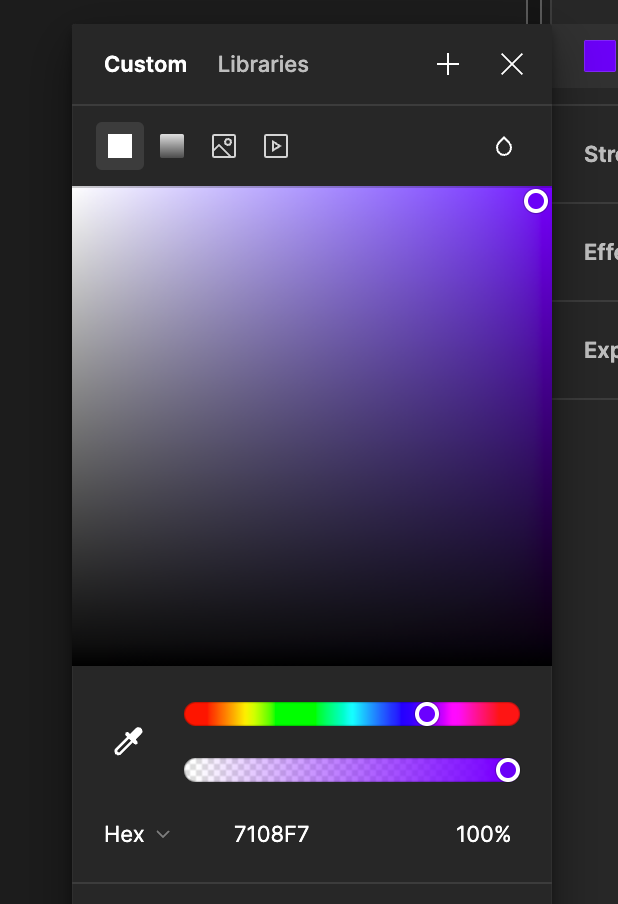
The colour pickers in Figma and the Chrome dev tools are a good example. But I like how Chrome’s shows the sRGB boundary so you know when you’ve selected a colour outside of sRGB.
Basic implementation
With an idea of what I wanted to build, the main challenge was how to render the sRGB boundary. I’d spent some time researching it on and off over the last year, until recently I had the epiphany – the Chrome dev tools are written in JavaScript, why not just look at the Chrome DevTools source code? So I had a dig through and found the responsible component. Turns out it was quite simple.
Given the hue:
- Iterate over every colour in the saturation/value space
- Convert the HSV to RGB
- Place the relative coordinates in the P3 colourspace
- Check whether that falls outside of sRGB.
- If it does, store the X,Y and move on to the next line
This gives us a number of points which we can use to plot an SVG line over the picker. When the hue changes, we recalculate and redraw the line.
The colour calculations
I was able to implement the calculations using ColorJS.io, a relatively new javascript colour manipulation library. It has comprehensive support for converting between pretty much any colour format and space. In order to generate the boundary line, we need to iterate through the S/V space using a nested for loop:
const hue = 0; // red
const width = 300; // picker width
const height = 300; // picker height

const step = 1 / window.devicePixelRatio; // pixel size to iterate with

const linePoints = [];

for (let y = 0; y < height; y += step) {
  const value = 1 - y / height;

  for (let x = 0; x < width; x += step) {
    const saturation = x / width;

    // check if the color is in the sRGB gamut, more info on this later
    const isInGamut = isInSRGBGamut(hue, saturation, value);

    if (!isInGamut) {
      linePoints.push({ x, y });
      break;
    }
  }
}
This loops through all the pixels in the S/V space and checks whether each point falls inside the sRGB gamut. If it doesn’t, it adds the point to the linePoints array and moves on to the next line. This generates the points on the boundary.
To check whether the point falls inside sRGB we can use ColorJS.io. Take the HSV values from our loop and check the gamut like this:
function isInSRGBGamut(h, s, v) {
  // convert to HSV to RGB
  let rgb = new Color("hsv", [h, s*100, v*100]).to("srgb");

  // Place the RGB coordinates in P3 space
  let p3 = new Color("p3", rgb.coords);

  // Check whether the P3 coordinates fall outside the sRGB gamut
  return p3.inGamut("srgb");
}
Now that we have our points, we can plot them in an SVG <polyline> :
<polyline points={points.map((point) => ${point.x.toFixed(2)},${point.y.toFixed(2)}`).join(" ")} />Finally, given the values for H, S, and V from our UI sliders, we can do the following conversions to create a P3 colour object:
let hue = 0; // <- value from hue slider
let sat = 1; // <- X value from SV slider
let val = 1; // <- Y value from SV slider
// Convert HSV to RGB
const rgb = new Color("hsv", [hue, sat * 100, val * 100]).to("srgb");
// Place RGB coordinates into P3
const p3 = new Color("p3", rgb.coords);
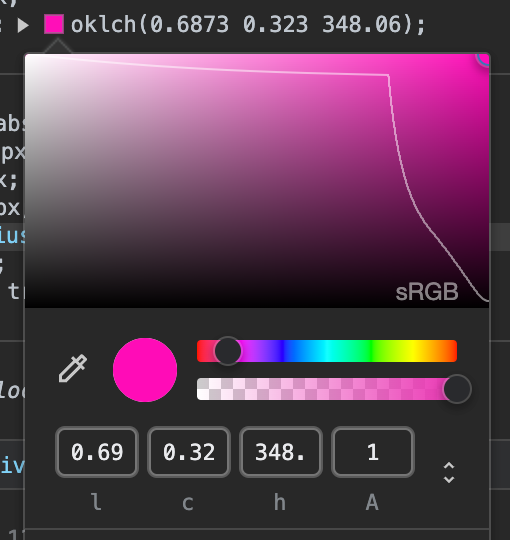
// Generate an OKLCH color value
const cssValue = p3.to("oklch").toString();Given the values HSV[0, 1, 1] (pure red), the result is the following CSS color value:
oklch(0.6486 0.2995 28.958)
You must be logged in to post a comment.